


 Printer Friendly Version
Manage your banking and credit card balances in QuickBooks by securely downloading transactions from the financial institution directly into your data file. QuickBooks will match the downloaded transactions to existing transactions, and will mark for review any discrepancies. No need to manually enter the missing transactions! You stay in control, by accepting or ignoring the transactions before adding them to QuickBooks.
Downloading transactions is accomplished with one of the following methods:
- Direct Connect – Users will login seamlessly to the financial institution within QuickBooks. This is the method discussed in this article.
- Web Connect – Users will download a file from the financial institutions website and then import this file into QuickBooks, also from the Banking, Bank Feeds menu.
The method used is often determined by your bank’s participation in the QuickBooks Bank Feeds feature and may automatically default during the setup. The cost of using Direct Connect with Bank Feeds (if any) also depends on your financial institution. So, whether you are up-to-date with your transaction data entry, or behind, Bank Feeds will help confirm, reconcile and add missing transactions. The result will be more accurate and timely reporting of your business expenses and account balances.
How to Set Up Bank Feeds
In just a few steps, you will be ready to download bank or credit card transactions into your QuickBooks file:
- Verify your financial institution participates. From the menu bar, select Banking, Bank Feeds, Participating Financial Institutions. For participating banks or credit card providers, you must first establish online account access directly with the financial institution. You will need to enter the User ID and password when completing the remaining setup steps in QuickBooks.
- From the menu bar, select Banking, Set Up Bank Feed for an Account. You can also access the setup from the New or Edit Account window, by selecting the Set Up Bank Feeds button at the bottom of the window. The Find Your Bank window displays, as shown here:
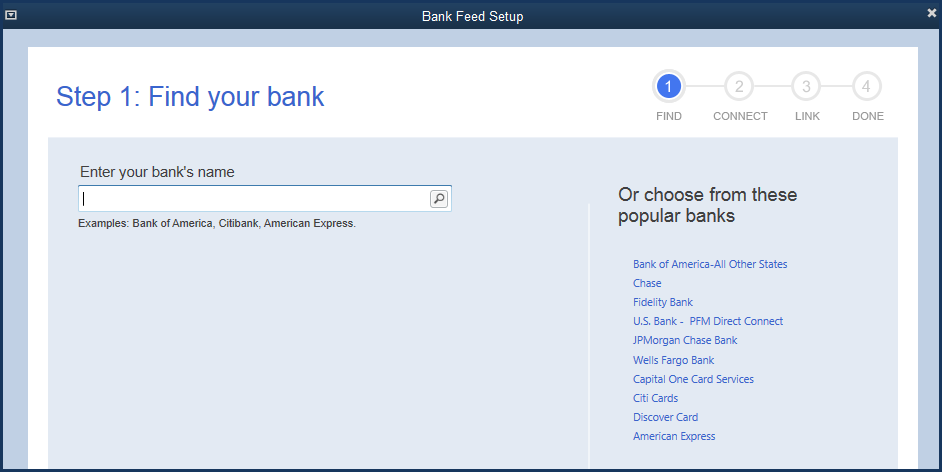
Most of the popular financial institutions participate.
- In the Enter Your Bank’s Name field, begin typing the financial institutions name, or select from the list on the right.
- If the bank or credit card participates, Step 2 in the Bank Feed Setup automatically displays. Type your User ID and Password. If you are having any troubles with the setup, contact information for your bank or credit card provider is listed on each of the setup windows, as shown below:
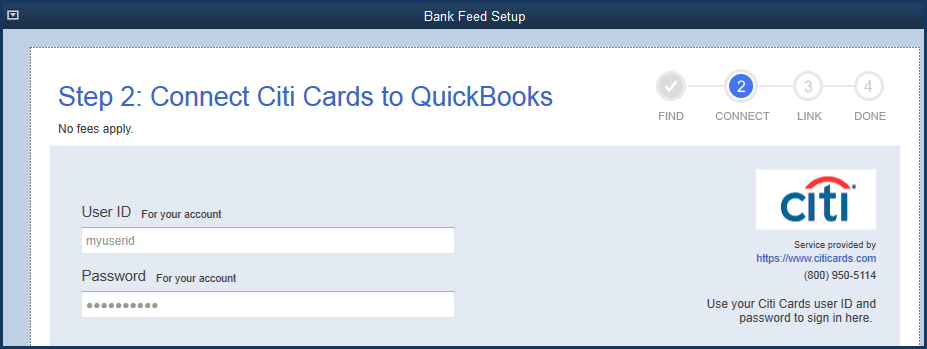
This User ID and Password is from your online setup with your financial institution.
- Next, in Step 3, from the QuickBooks Accounts drop-down select an existing QuickBooks account, or create a new account. This step directs which QuickBooks account you want the Bank Feeds transactions to be downloaded into, as shown here:
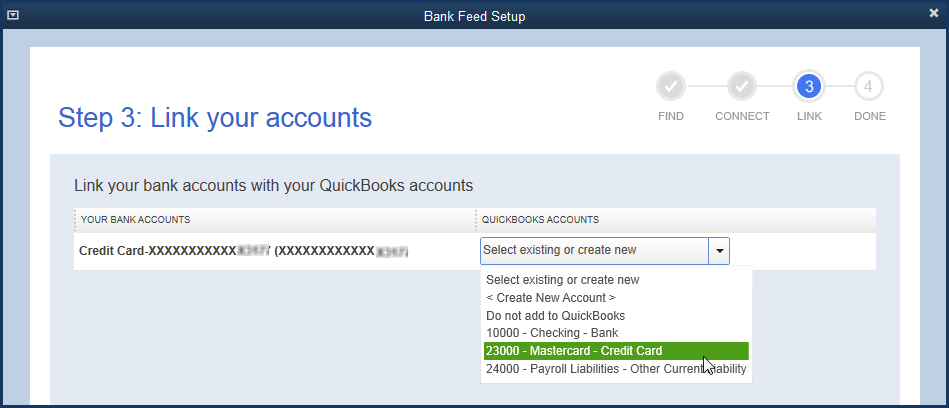
Here you associate your online bank or credit card with an account in QuickBooks.
- Step 4: Success! message displays in the Bank Feed Setup window. Click Close to complete the setup. You are now ready to manage your bank feeds in QuickBooks.

Now you can begin using Bank Feeds for this account.
Manage Bank Feeds
Having setup your bank or credit card accounts to accept Bank Feeds, you are ready to save time and improve data entry accuracy! If this is your first time downloading data into QuickBooks, no worries, the Bank Feeds will do a great job of matching transactions, avoiding any duplication. Or perhaps, you are behind on your data entry and will use the download to automatically create those missing transactions. Both needs are met very well with Bank Feeds. However, the period of time that is downloadable the first time with Direct Connect is controlled by the financial institution.
http://www.youtube.com/watch?v=IVQwDWkO2rw
With each successive download, Bank Feeds will know what has already been downloaded and will add any new transactions. Let’s get started with these simple steps:
- To launch Bank Feeds, from the menu bar, select Banking, Bank Feeds, Bank Feeds Center.
- The Bank Feeds Account Information displays. In the top right, with your cursor click the refresh icon, or from the drop-down choose to Sync All For This Bank or Sync This Account. You are in control, choosing when to synchronize your file with the financial institutions online data.
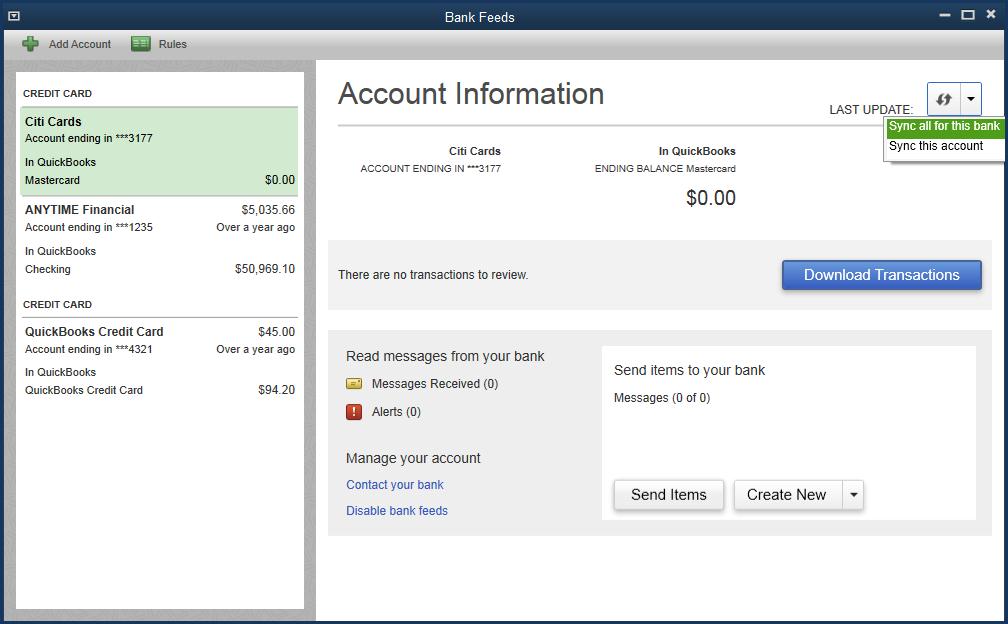
Bank Feeds replaces the formerly titled feature of Online Banking.
- Type your Pin/Password as recognized by your bank or credit card. (Your User ID was stored when you first created the link between QuickBooks and the institution). Click OK to proceed.
- The Bank Feeds Account Information window now displays details about the selected account. The at-a-glance summary of the balances per your bank/credit card as compared to the balances in QuickBooks is one of the many improvements made to QuickBooks online banking functionality. From this window you can:
- View the Transaction List of newly downloaded transactions
- Create new online checks, pay bills, transfer funds, send your bank/credit a message and other actions. (Your bank may charge a fee for these added online services)
- Create a credit card payment
- Contact your bank
- Disable bank feeds
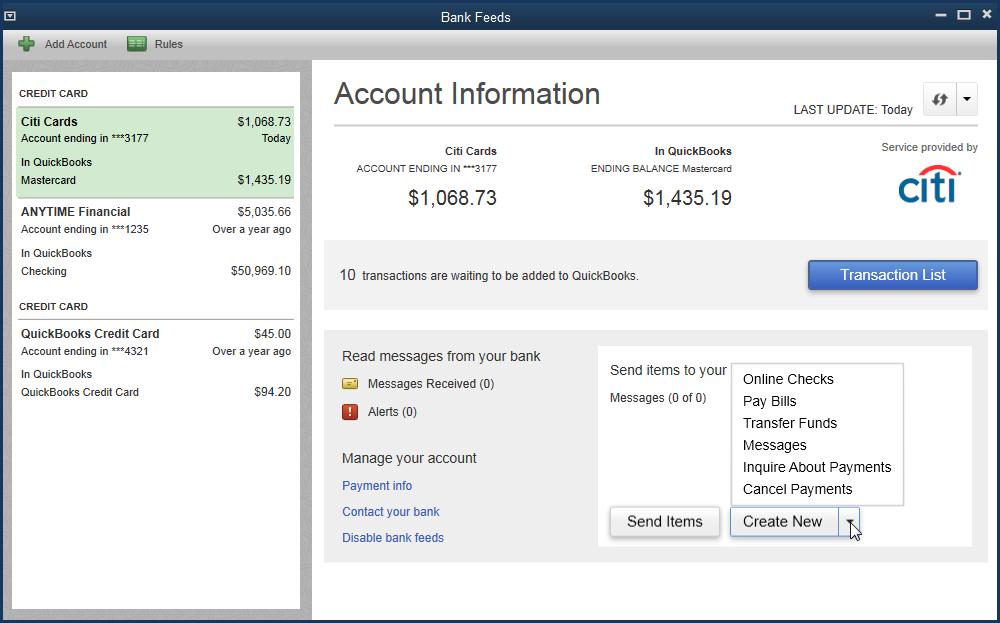
The new Account Information window helps you manage your online transaction details.
- From the Bank Feeds Account Information window select Transaction List. Bank Feeds displays a list of downloaded transactions separated into three groupings, click on the colored bar at the top of the window to filter the results for the following:
- New to QuickBooks – transactions that have not yet been added to your QuickBooks file.
- Chg – transactions that have been changed due to a renaming rule.
- Auto – transactions that were automatically entered from following a specific renaming rule.
- Add/Approved – transactions that you have approved while viewing the Transaction List.
- For each selected transaction assign a Payee and Account. Choose to manage the transactions individually on the right in the Action column. Options include:
- Quick Add – transaction will be added to QuickBooks.
- Ignore – transaction will not be added to QuickBooks and will be removed from future download details.
- Choose from other specific actions depending on the type of transaction selected.
- Optionally, select multiple transactions and choose to Add/Approve or Ignore from the Batch Actions drop-down list at the bottom of the window, as shown here:
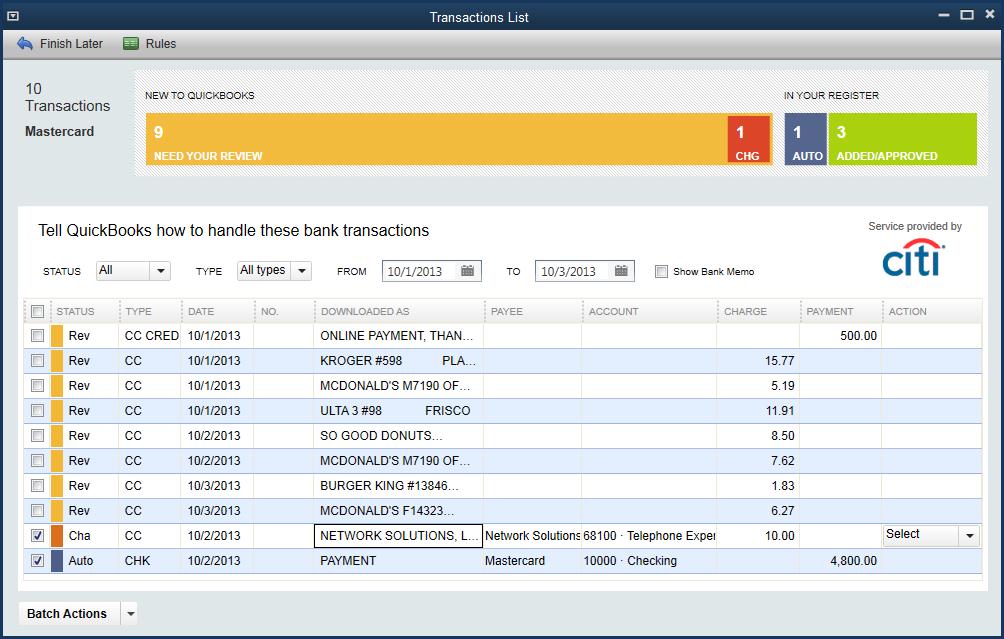
Click on any section of the colored bar to filter the results displayed or to open the register.
- To view the QuickBooks register for the selected account, click on the green Add/Approved bar at the top of the Transaction List window.
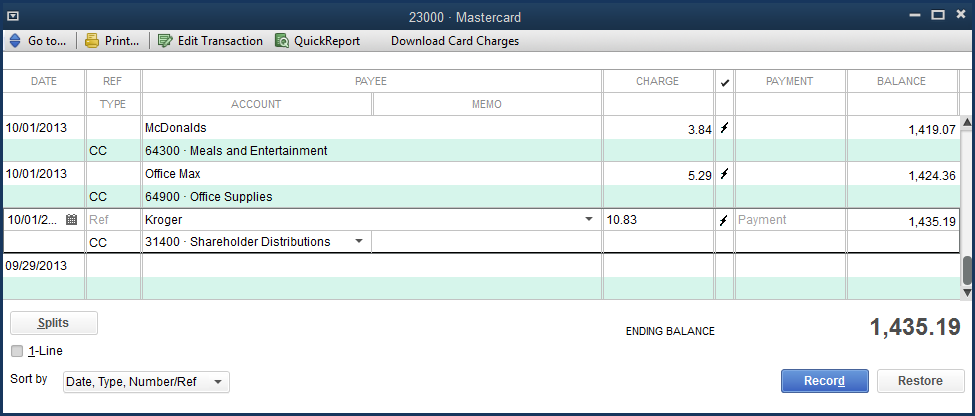
Toggle to the register by clicking on the Add/Approved bar in the Transactions List.
Success with Bank Feeds is when your financial institution balance is the same as the balance in QuickBooks. Now how easy was that! The QuickBooks user stays in control, viewing each of the transactions before adding them to the file.

This account in QuickBooks is now and agrees with the institutions online balance.
Renaming Rules
Renaming rules helps Bank Feeds predict what payee name and account you want assigned to each transaction. Managing your renaming rules is easy with these steps, and as you continue to use Bank Feeds, less and less effort will be required on your part:
- After selecting Add/Approve the Rule Creation window displays. From this window you can choose to change the conditions Bank Feeds sets automatically. Click OK when completed, as shown below:
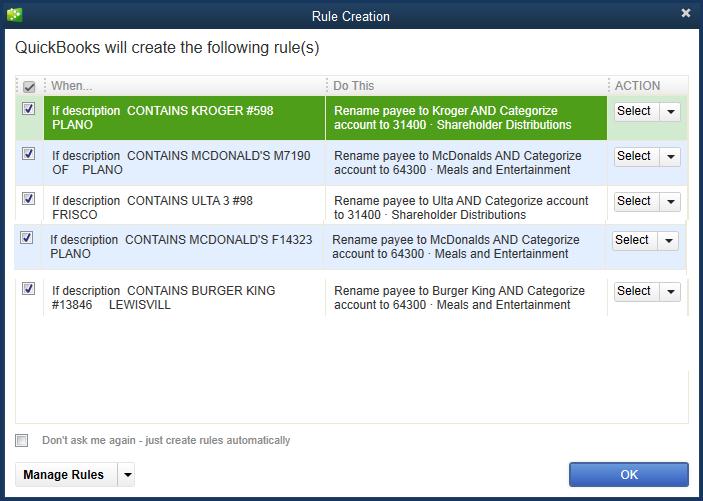
Bank Feeds automatically creates renaming rules that you can edit.
- Access Rules from the Transaction List, Rules link on the top left. Rules can also be added manually. Click Save when completed.
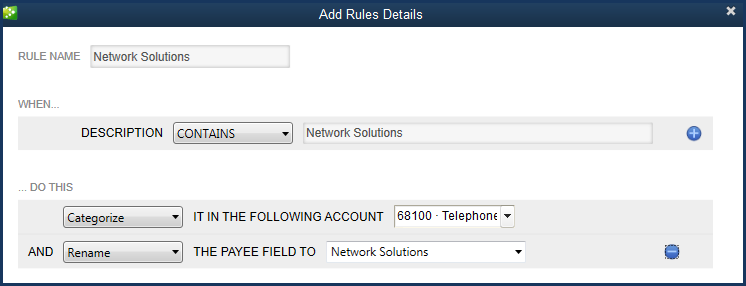
Manually add or edit Renaming Rules.
It just makes sense to use the new Bank Feeds secure download of transactions into QuickBooks!
Other Connected Financial Services
Some financial institutions do not offer online vendor bill payment from within QuickBooks. If this is a feature that would save you time, then you might be interested in the Intuit QuickBooks Bill Pay service.
With Intuit QuickBooks Bill Pay Service you can:
- Make payments to any company or individual (in the United States only)
- Pay multiple bills with a single payment
- Enter once in QuickBooks and then send to your online banking institution to complete
- Schedule payments in advance
To learn more about this offering, from the menu bar, select Banking, Bank Feeds, Learn About Online Bill Payment.