


 Printer Friendly Version
To use QuickBooks to track your recurring loan payment, follow these steps:
- From the menu bar, select Banking, Loan Manager.
- Click Add a Loan and complete the information as displayed here:
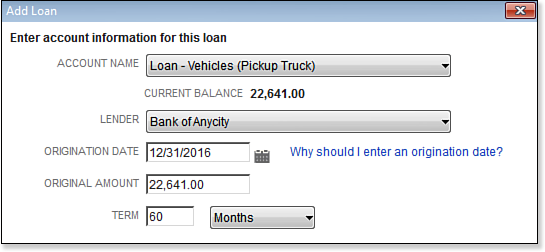
Complete the account information for the loan.
- In the Account Name drop-down list, select the long-term liability account for the loan.
- In the Lender drop-down list, select the payee.
- Enter the loan Origination Date.
- In the Terms drop-down list, select Weeks, Months, or Years. Click Next.
- Enter the Due Date of Next Payment, Payment Amount, and optionally, Next Payment.
- Select the Payment Period.
- (Optional) Choose Yes or No to making an escrow payment and complete the fields for Escrow Payment Amount and Escrow Payment Account.
- (Optional) Select the box to be alerted 10 days before the payment is due. Click Next.
- Enter the Interest Rate and select a Compounding Period.
- Choose a bank account from the Payment Account drop-down list.
- Choose the Interest Expense Account and the account for Fees and Charges.
- Click Finish. QuickBooks displays information in the Loan Manager about the newly created loan, as shown here:
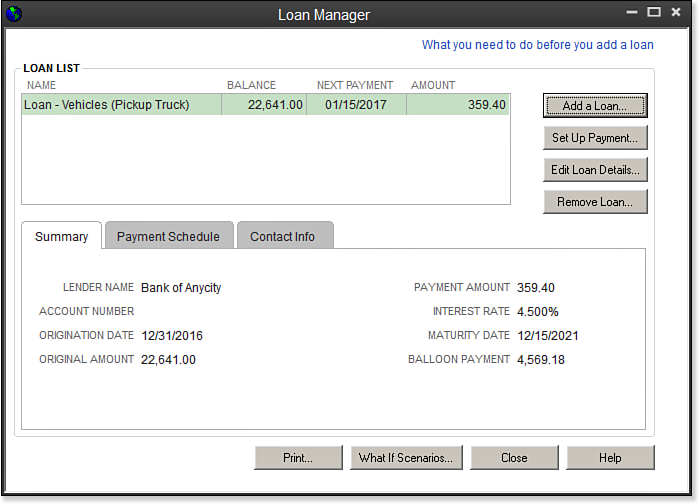
Use the Loan Manager to track long-term loan details.
From Laura Madeira’s QuickBooks 2013 In Depth