


 Printer Friendly Version
To set up a payment for a loan using the Loan Manager program in QuickBooks, follow these steps after selecting from the menu bar, Banking, Loan Manager.
- Select the loan from the list and click the Set Up Payment button. The Set Up Payment dialog box displays as shown here:
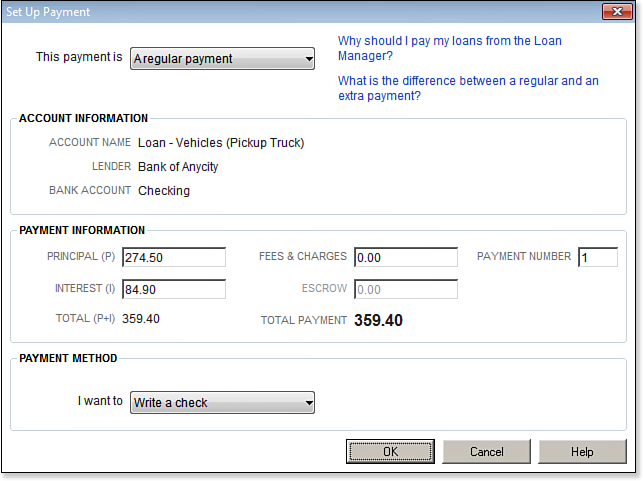
The Loan Manager can create the payment for the loan.
- In the This Payment Is drop-down list, select one of the following options: A Regular Payment or An Extra Payment.
- View the Account Information and Payment Information. Modify the Payment Information if necessary.
- Select a Payment Method choosing between Write a Check or Enter a Bill.
- Click OK and QuickBooks prepares a check or bill with the correct payment information.
Additionally from the Loan Manager, you can do the following:
- Edit the loan details or remove the loan.
- View summary information about the loan.
- View the payment schedule by payment number.
- Access contact information for the vendor, as set up with the original vendor record.
- Print the details of the loan.
- View multiple What If Scenarios, as shown below:
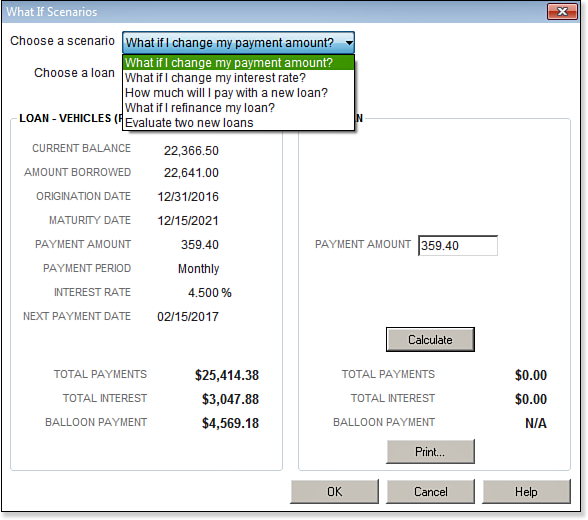
Use the QuickBooks Loan Manager to analyze different loan payoff scenarios.
From Laura Madeira’s QuickBooks 2013 In Depth