


 Printer Friendly Version
Setting up users with permissions is recommended when you have multiple users working in the same QuickBooks file. Transactions are assigned to users and many changes to the file are also tracked to the user who logged in to the file.
To create a user login and set permissions for additional users, follow these steps:
- From the menu bar, select Company, Set Up Users and Passwords, Set Up Users.
- From the User List dialog box, select Add User.
- Enter a User Name and Password (optional but recommended) and enter the password again to confirm.
- If you need to add additional licenses to your QuickBooks file, click the Explain link.
- If you didn’t enter a password, click Yes to create a password or No to skip this step.
- Select the access option:
- All areas—Provides access to all areas of QuickBooks except those which require Admin access.
- Selected areas—Allows you to choose the options for access to each sensitive area of your QuickBooks data.
- You now work through nine permission screens and on the tenth screen (see image below) you can review the permission settings. Each dialog box offers details about the access levels and most include some or all of the following permission levels:
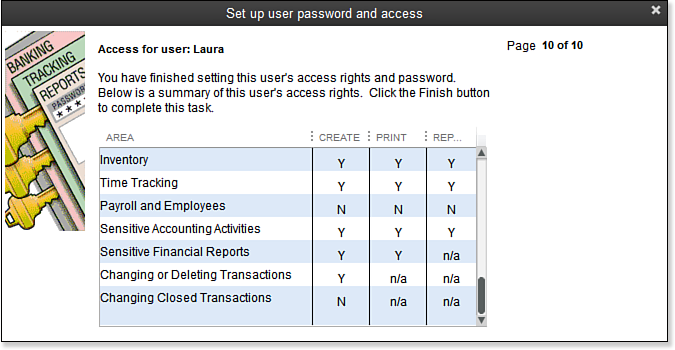
You can review a summary of the access rights assigned to a QuickBooks user.
- No Access
- Full Access
- Selective Access—Includes all or some of these options:
- Create transactions only
- Create and print transactions
- Create transactions and create reports
If you are uncertain about the limitations of a permission setting in QuickBooks Pro or Premier, I recommend you set it for the Create Only option—the highest level of security. Then log in as that new user and attempt to access an area the employee will work in or an area she shouldn’t be in to determine if the permissions assigned provide the controls you need. QuickBooks will tell you what level of permission is needed for any task you attempt.
From Laura Madeira’s QuickBooks 2013 In Depth