


 Printer Friendly Version
To modify the columns that display on the items list, follow these instructions:
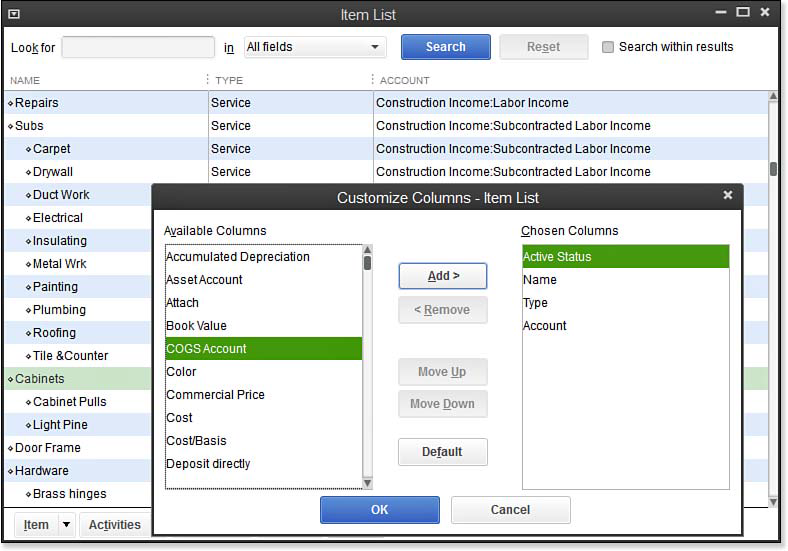
- In the Item List dialog box select Lists, Item List from the menu bar, right-click and select Customize Columns.
- In the Customize Columns dialog box, as shown below, add the COGS Account by highlighting it in the Available Columns pane and clicking Add to include the account in the Chosen Columns pane on the right. Add (or remove) from the Chosen Columns pane those fields that you want (or don’t want) to see when viewing the Item List dialog box.
Right-click the items list to customize the columns to display.
- Click the Move Up or Move Down buttons in the center of the dialog box to customize the order in which you want to view the columns, and then click OK.
- Optionally, to widen columns of displayed data on your computer screen, place your mouse on the right edge of a column header and drag to make the column wider or smaller.
- Optionally, click a header column to sort the displayed data by the selected column.
- Click the X in the top-right corner to close the Item List.
From Laura Madeira’s QuickBooks 2013 In Depth