


 Printer Friendly Version
To properly prepare reports with cash basis reporting and to properly report on sales by item, you should perform additional steps for those open invoices that had partially paid balances as of your startup date. These steps are required only if you want to accurately track sales by item:
- From the menu bar, select Lists , Chart of Accounts.
- In the Chart of Accounts dialog box, select New from the Account drop-down list. The Add New Account: Choose Account Type dialog box opens.
- Select the Bank account type and click Continue.
- In the Account Name field, type the name Prior Year Payments Account . If account numbering is enabled, enter an account number. Select No to the Set Up Online Services message. This is a temporary account that will later have the balances moved to the Opening Balance Equity account in step 15. Click Save & Close.
- From the menu bar, select Lists , Item List.
- In the Item drop-down list, select New. The New Item dialog box opens.
- In the Type drop-down list, select Payment , and then in the Item Name/Number field, type the name Prior Year Payments.
- Assign the Prior Year Payments account created in step 1 as the account to Deposit To (as shown below). Click OK.
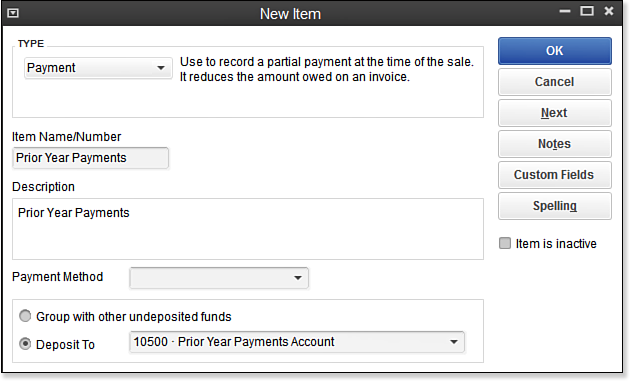
Create a payment item type to use on partially paid startup customer invoices.
- To create a partially paid invoice with an open balance, from the menu bar, select Customers, Create Invoices.
- In the drop-down list, choose the appropriate Customer:Job.
- Enter the original invoice date (it should be before your QuickBooks start date), and enter the invoice number originally presented to the customer for payment.
- On line 1 (or more if needed) of the customer invoice, enter your normal service or product item you sold to the customer. On the next available line, use the new Prior Year Payments item you created, and enter the total of the customer’s prior payments as a negative amount, as shown here:
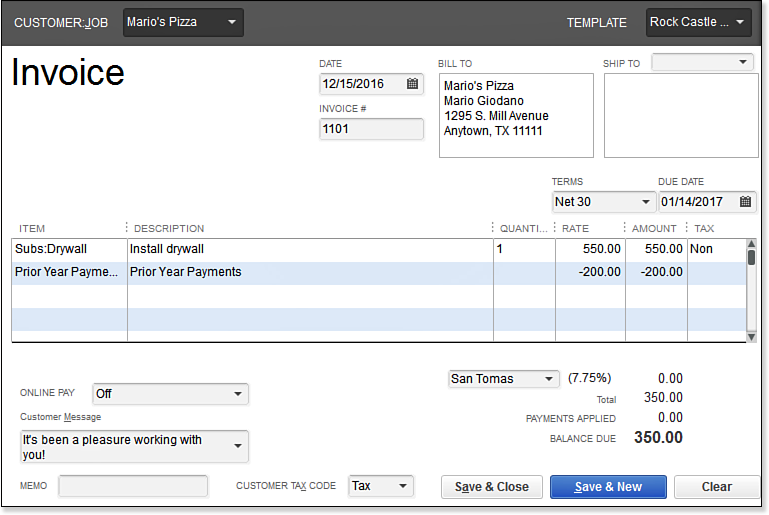
Creating an invoice that was partially paid before the date you started using QuickBooks.
Click Save & Close if you are finished, or click Save & New to create additional open customer invoices.
- Verify that the Balance Due amount on the invoice accurately matches the open invoice total from your prior accounting list or report.
- Compare your QuickBooks A/R Aging Summary report to your open invoices startup list total. If the balances agree, go to step 15. If they do not agree, review either the Summary or Detail A/R Aging report and identify which customer(s) balances are incorrect.
- When your totals agree, click Banking, Use Register, and select the Prior Year Payments Account.
- To close the fictitious bank account balance to the Open Balance Equity account, enter the following on the next available line of the register.
- For the date, enter the day before your startup date. Optionally for the number, use the term Closing.
- In the payment column, enter the same dollar amount as the register total displayed prior to this transaction.
- In the Account field, select the QuickBooks-created equity account named Opening Balance Equity.
- Click Record to save the transaction.
Your Prior Year Payments bank register should now have a zero balance.
–> For more information, see “Closing Opening Balance Equity into Retained Earnings,” p. 568 of Laura Madeira’s QuickBooks 2013 In Depth.